Sunday, 2 November 2014

2D

Creating niches


Equipment:

  • A cutting mat
  • A cutting knife
  • An old book
  • PVA glue
  • Clothes pegs


Health and safety:
Be careful with the cutting  knife as they can be quite sharp
Keep area around you clear for others and yourself

What is a Niche?
As the name suggests, it is a "hole" cut through one or more pages of a book. This creates a space that altered book artists and other arts and craft people use for multiple purposes.

Step by step
  1. Decide how you intend to fill the niche. This will determine the size and shape.
  2. If you are using a 3-D element, a key, for example, you will need to determine how many pages you must cut through. Place the key on the outside edge of the book's pages to determine the desired thickness. If you want your book to close flat afterwards, you must make your niche a little thicker than your key. (Some AB artists don't care if the book doesn't close; it's up to you.)
  3. Decide the placement on your page. Cutting a thick opening close to the spine will result in an unsightly ridge of cut pages that will stick up and prevent your book from closing properly. Alternatively, cutting a thick niche too close to the outer edges will create undue stress on the spine and possibly lead to damage.
  4. Decide on the shape you want to use. Squares and rectangles are the easiest, but you can cut any shape you want.
  5. Using a pencil and ruler (if you want a straight line), draw the niche on your top page.
  6. Place a cutting mat underneath the last page that you intend to cut. By cutting mat, I refer to a hard surface that will prevent you from cutting through to pages that you want to protect.
  7. Fasten your pages with the clothes pegs to hold them in place while cutting. 
  8. Cut your niche using the knife.
  9. If your niche is thick, you will not be able to cut through all pages at once. Cut through as many pages as you can, then using the last cut page as your template, cut some more. Continue until all desired pages are cut. 
  10. In most cases,the inner edges of your niche will be messy. Many of us don't care, believing this to be part of the charm of an altered book. If you do care, tidy up the inner edges by cutting, sanding, painting, etc. Another approach is to line the entire niche, including the edges, with paper or vellum.
  11. Fasten together the pages used for the niche.
  12. Fill or decorate your niche as planned.

Print

Printing
Additive method monoprinting with collage
  • The additive or light-field method, in which the image is painted by adding or building up pigment onto the plate


Collage monoprints 
The term collage is not used in its traditional meaning; materials are not glued on the surface but are used on the paper either inked or not inked. Materials often used are cut or torn shapes from textured papers, lace, cloth, thin vinyl sheets, leaves, and even metal grating.

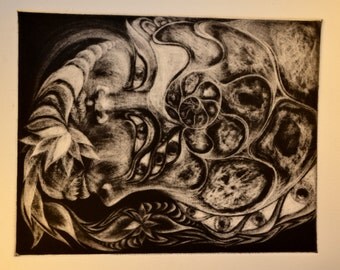
Reductive method monoprint 


  • The reductive or dark-field method where the entire plate is covered with a thin layer of pigment, which the artist then works out his image by removing some of the pigment with brushes, rags, sticks, or other tools.
Stenciling with monoprint
  • By using stencils made from card or pre-made you can create easy and effective designs.

Painterly method monoprint
With this method you paint the shape onto the plate, you can create extremely colourful designs, you can also create effect using layers with this method.


Painterly method video step by step

Equipment
  • Heavyweight vinyl
  • Mylar or acetate
  • Masonite
  • Discarded thin litho zinc or aluminium plates
  • Oil based ink or (Akua-Kolor, Createx)

Health and safety
  • When using the press mind your hands with the wheel and the press itself.
  • Keep work area clear
  • Do not leave bags, coats or other items around the floor or desk.

3D Ceramics


Ceramics
Equipment needed:
Clay
Cutting tools
Slip
Coloured slip (optional)
Glaze

 My own procedure:
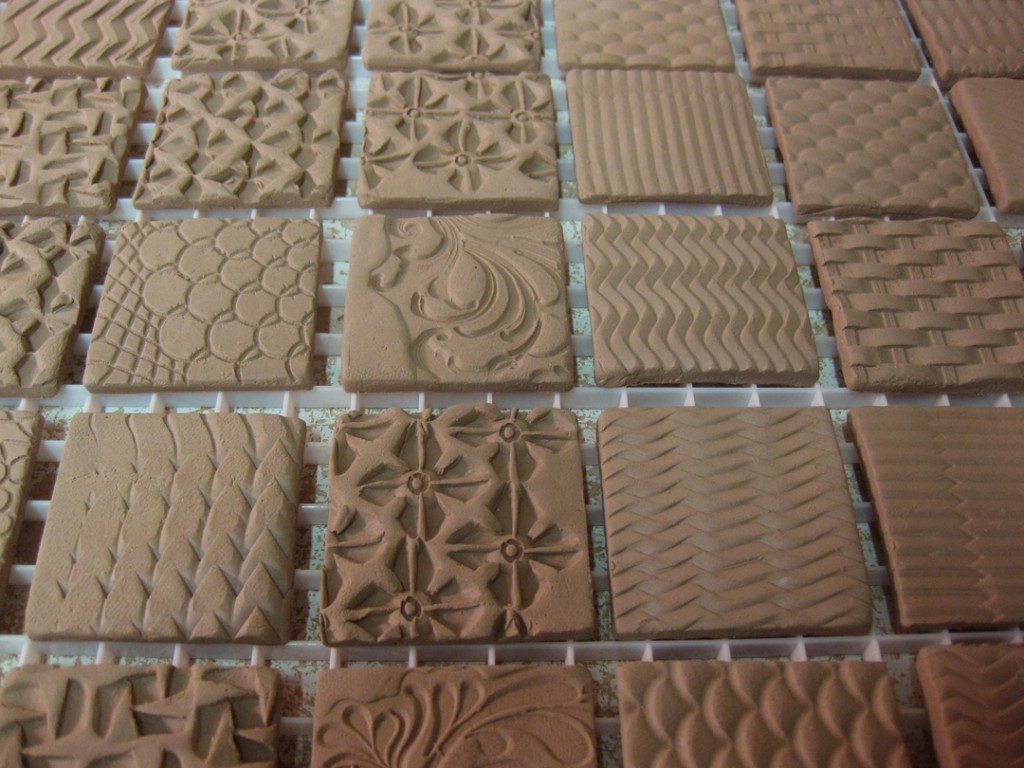
1. My first task was to design my ceramic tiles on a piece of paper, this makes you consider the composition of the piece, however some people may not feel the need to do this. I then created one A4 sized tile with my design on it, after doing this your piece had to be split into 3-4 pieces to create a new design. After applying the color glaze and colored glass the tiles then went into the kiln.

2. I then created a 3D ceramic, I chose to make a prism with four sides and a base using slip. Then I created a new design based on my results of my first task and added it to my prism. I made two prisms in this task and created designs on both of them, I then proceeded to paint my ceramics and they were put in the kiln.

Health and safety
  • When using tools you should always be aware
  • Clean your area, clay leaves a lot of dust behind that is bad for other people's and your lungs.
  • Gloves are provided if wanted
  • Keep items off the floor e.g coats, bags etc
  • Be aware of your surroundings in the kiln


Macro

MACRO

A lens having a reproduction ratio of 1:1  
Macro photography is taking extremely close-up images of subjects. The technically correct definition would be to take an image at a 1:1 ratio but, in general usage, the term has come to mean any close-up photography.

Macro capable photography lenses are marked with magnification ratios such as 1:1 or 1:5. A 1:1 ratio means that the image would be the same size on film (negative) as in real life. A 1:5 ratio would mean that the subject would be 1/5 the size on film as it is in real life. Due to the small size of 35mm negatives and digital sensors, a 1:5 ratio is nearly life size when printed onto 4"x6" paper.


From Makros – a Greek word meaning large, l  o  n  g 

• Macro is the term used to describe photographs 

where the subject is recorded as life size or up to 

10 times bigger than life size. 


Close-up is where the subject is recorded 
between one tenth of its actual size to life size. 


Any small detailed items can be used and arranged into a composition, when capturing macro photography a tripod is essential as your focus area is extremely small and hard to capture if you are not completely still.


The greater the magnification used, the 
shallower your depth of field becomes. The old 
rule of choosing the smallest aperture possible 
stands true, but only to an extent. At apertures of 
f/22 or f/16, a loss of general image sharpness 
can occur through diffraction

(diffraction - the process by which a beam of light or other system of waves is spread out as a result of passing through a narrow aperture or across an edge, typically accompanied by interference between the wave forms produced.)


Equipment:

DSLR, Set of x3 extension 

tubes (12mm, 20mm, 36mm), light trigger and receiver, 

hand held light meter, lighting equipment, light table, 

black and white backdrops. 

 If the camera is set to f/16 and you 

are using a 12mm extension tube the light meter will 

need to read f/16.5 (half a stop brighter). If set to f/11 

on camera and using a 12mm extension the light must 

be f/11.5. 

Possible lightings:
  • Daylight
  • Artificial light - torches or table lamps
  • Off camera flash
  • Ring flash - ideal (expensive)
  • Use absorbent or translucent materials out of shot to add, reduce or diffuse light
Beware of shadows!

ISO – 100 ISO is ideal but you may need to increase this if 

light is low 

Shutter speed – if your subject is completely still and you 

are using a tripod, then shutter speed can be anything you 

like! You may wish to increase this if your subject is 

moving. When using studio flash you should use 1/60. 

Aperture – depth of field is very limited so this suggests a 

small aperture. However image quality will be reduced at 
very small apertures. Somewhere between f11 and f16 is 
generally an acceptable compromise. 


 Own images using 1/60, 100ISO and
f/11, focus ring set to infinity.


Studio lighting and extension tubes


The Esprint 500
There are many different models of the Bowens studio flash heads. The Esprint
500 series gives full control over the lights intensity, and allows you to control both
the modelling lamp and flash tube.

Bowens Esprit 500 Kit

Padded carrying case
x2 lighting stands
x2 power leads
x2 flash heads
x1 sync lead or Trigger & Receiver
x1 reflective umbrella
x1 soft box
x1 reflective hood
x2 protective plastic caps


  •  

    • Soft Box – diffuses light to soften shadows
    • Flash Head / unit
    • Centre bulb = modelling lamp
    • Ring bulb = Flash
    • Snoot – used to highlight
    • Models hair. 
    • Spot light. 
    • Reflectors 
    • Gold = soft tones reflected
    • Silver = cooler tones reflected
    • Barn doors
    • Umbrellas
    • White = diffuses light
    • Black/silver = reflects light 
    • Reflective hood / dish
    • Trigger and Receiver


    Health and safety


    The ring flash shown here and the modelling lamp is made of very 
    fine glass that can cause painful glass splinters if broken. 
    • Do not touch the bulbs at any time, especially after use, as they will be hot.
    • Do not knock the bulbs when fixing light accessories to the unit.
    • Do not put the protective plastic cap over the bulbs until they have 
    cooled. Leave the light accessory in place until ready.
    • Do not leave lights on when not in use

    It is important to keep your work area safe
    • Leads should be kept tidy and either taped to the floor or covered 
    with rubber mats
    • Do not leave coats and bags on the floor
    • Do not set your equipment up by a door way or in front of a fire exit
    • Act responsibly when around expensive and fragile equipment.

    The flash meter


    Mode
    1. 2. 3.
    1. Ambient light (available)
    2. Flash (not connected)
    3. Flash with Sync lead


    Extension tubes
    Extension tubes are used for close up, macro work. They
    generally come in three different sizes; 12/13mm, 20/21mm & 
    31/36mm (note the sizes may change depending on the 
    make). One or a combination of extensions increase the 
    magnification of the lens and are attached to the camera in 
    between the camera body and the lens itself.


    Own images using extension tubes: 

    When using extension tubes you need to set the focus ring on your lens to
    infinity. To focus your image you will physically have to move the camera closer or
    further away from the subject. You should also set your lens to a small aperture

    (f/16) and adjust the lighting units accordingly until you get the correct reading,
    remember the table above. Example: if you are setting your camera to f/16 and you
    are using a 31mm extension, you need to make your lighting brighter until your light
    meter is reading f/22.5 (f27)


    1. High-key lighting is a style of lighting for film, television, or photography that aims to reduce the lighting ratio present in the scene. This was originally done partly for technological reasons, since early film and television did not deal well with high contrast ratios, but now is used to suggest an upbeat mood.
      1. Low-key lighting is a style of lighting for photography, film or television. It is a necessary element in creating a chiaroscuro effect. Traditional photographic lighting, three-point lighting uses akey light, a fill light, and a back light for illumination.


    Aperture and shutter speed

    What is Aperture?

    Put most simply – Aperture is ‘the opening in the lens.’
    When you hit the shutter release button of your camera a hole opens up that allows your cameras image sensor to catch a glimpse of the scene you’re wanting to capture. The aperture that you set impacts the size of that hole. The larger the hole the more light that gets in – the smaller the hole the less light.
    Aperture is measured in ‘f-stops’. You’ll often see them referred to here at Digital Photography School as f/number – for example f/2.8, f/4, f/5.6,f/8,f/22 etc. It can mean the difference between one dimensional and multi dimensional shots.
    Depth of Field (DOF) is that amount of your shot that will be in focus. Large depth of field means that most of your image will be in focus whether it’s close to your camera or far away.
         
    These images have a small depth of field (DOF)
          
    These images have a large depth of field (DOF)
    Depth of field examples using F numbers:

    Nikon Digital SLR - D40/D50/D3000
      The mode dial is the small circular knob on the top right of the camera on this picture this controls the aperture priority, the circular dial beneath the mode dial to the right is the main command dial; this changes your aperture when using aperture priority.
    The F number and shutter speed are displayed on the camera's digital screen, for example the F number on this camera is f 5.6 and the shutter speed is 1.

    Dark room machinery

    The enlarger.


    Features:

    1. Enlarger column with measuring scale
    2. Enlarger head

    3. Base board
    4. Filter on/off switch
    5. Negative holder
    6. Negative holder lock
    7. Filter adjustment dial and strength indicator
    8. Enlarger height adjustment lock
    9. Focus dial
    10. Enlarger lens and mount
    11.  Aperture ring 

    Health and safety


    • Do not place your hands in chemical trays (gloves are provided if required).
    •  Wash hands with warm water and soap if splashed. 
    •  No wet trays or tongs in enlarger bays.
    •  Always use a tray when carrying prints.
    •  Clean up any spillages.
    •  Dry hands before operating enlargers. 
    •  Reports any faults to the technician or lecturer.
    •  Do not leave any items on the floor
    •  If chemicals happen to get in eyes there is an eye wash provided that will be near you.